Hoop Guard Instructions

How to Attach Hoop Guard

Hoop Guard fits snugly onto the bottom of Snap Hoop’s flat magnetic top frame. To attach, separate the magnetic top of Snap Hoop or Snap Hoop Monster from its metal base.

Place Hoop Guard’s channel under the frame’s right side with Hoop Guard’s inside wall on the inside of the frame and the tall outside wall on the outside of the frame.

Flip the frame over and slide the Hoop Guard between two magnets.

If Hoop Guard completely covers the magnets, you will lose some of the magnetic force. Try to position Hoop Guard between magnets whenever possible. If using a large hoop, two Hoop Guards can be attached in the same manner.
Quilts
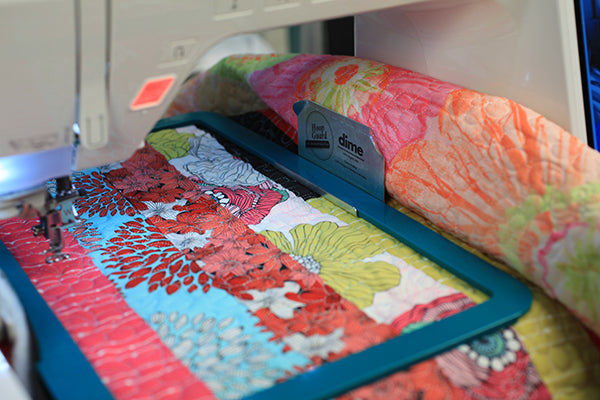
When embroidering on cumbersome quilt sandwiches, let Hoop Guard keep the rolled quilt out of the sewing field. Attach Hoop Guard to the right side of the magnetic frame as shown. Place the design area over the metal frame. Roll the right portion of the quilt and attach the hoop to the machine.

Consider using two Hoop Guards after testing the strength of the magnetic force.
Towels

Bulky terrycloth towels can be held in check with Hoop Guard. Attach Hoop Guard to the right side of the magnetic frame as shown previously. Place the design area over the metal frame. Roll the right portion of the towel and attach the hoop to the machine.

If an extra barrier is needed, consider using two Hoop Guards after testing the strength of the magnetic force.
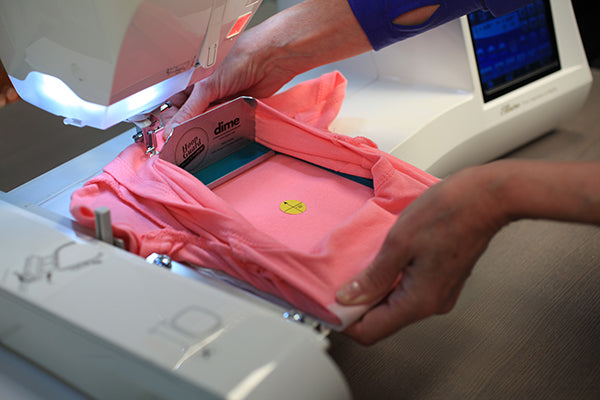
Onesie

Use Hoop Guard to open a baby’s snap suit during the embroidery process. Fuse polymesh cut-away stabilizer to the wrong side of the front of the suit. Separate the metal frame from the top magnetic frame.

Since a baby’s snap suit is small, select a small hoop (4” x 4”). Attach the Hoop Guard to the bottom of the magnetic frame.

Mark the location of the design and turn the snap suit inside out. Place the suit over the metal frame, with the suit’s front (design area) laying on the frame. Position the neck at the bottom (closest to you) of the frame.

Insert the magnetic top with the Hoop Guard into the suit from the leg opening. Thread Hoop Guard through the neck.

Pull the bulk of the suit over the Hoop Guard, exposing the design area.

Attach the hoop to the machine. Verify the top and bottom frames are aligned with your hands.
Select the design. Since the suit is on the machine upside down, rotate the design 180 degrees. Command the machine to trace the perimeter of the design. Keep an eye on the design area during the trace to make sure the suit will not get caught in the stitches. Make any necessary adjustments and stitch the design.
Best Practices
Select a hoop that’s larger than required to allow space around the design and the perimeter of the hoop. Hoop with the design area in the center of the hoop, not near the edge of the sewing field.
The frame cannot be attached to the machine if Hoop Guard is on the top (or back) of the magnetic frame.

When Hoop Guard is attached on the top (or back) of the frame, the presser foot lifter may hit the Hoop Guard.

If Hoop Guard is attached improperly, the needle bar can touch Hoop Guard. Always place the tall wall on the outside of the magnetic frame.
